Getting Started
Install, analyze, preview, and clean up safely
This guide walks through the safest first run for a production WordPress site using the plugin's tabbed admin screen.
1. Install the plugin
- Open the WordPress.org plugin page.
- Install and activate the plugin on your WordPress site.
- Go to
Tools > Thumbnail Manager. - Use the tabs at the top of the plugin screen to move between Analysis, Cleanup, Optimize, Backup, and Reports.
2. Run a full analysis
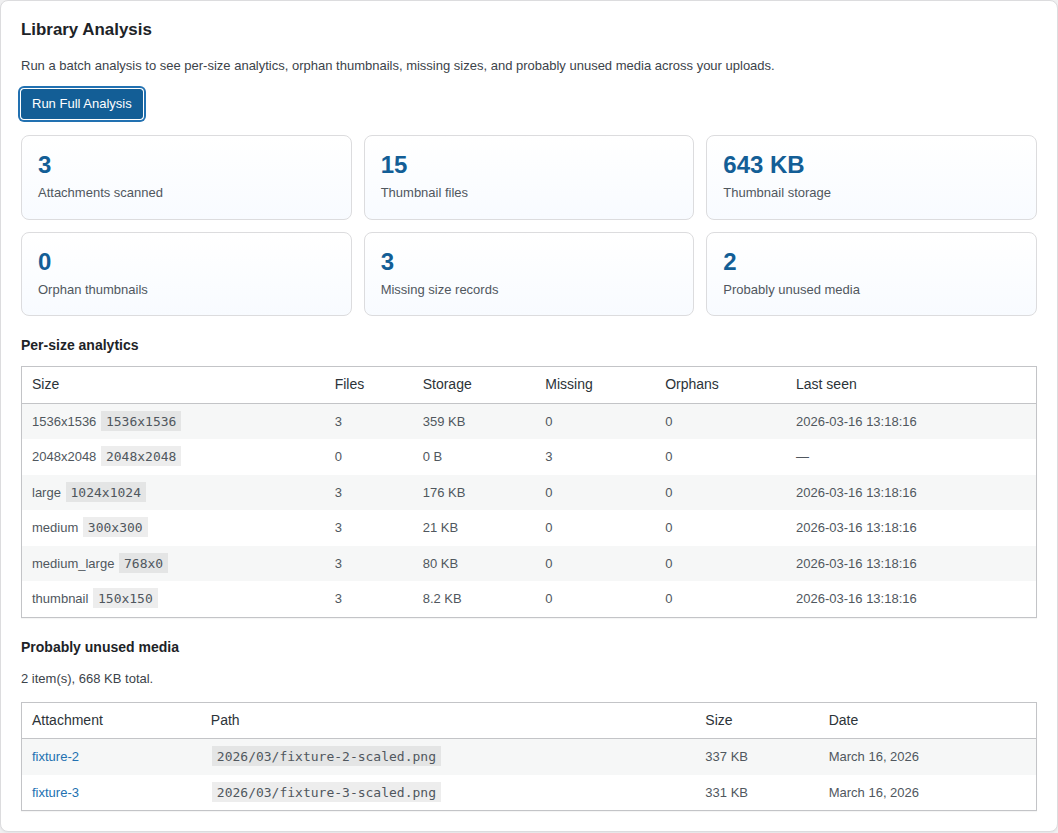
Start in the Analysis tab before any cleanup. This gives you visibility into thumbnail storage, missing sizes, orphan files, and probably unused media.
3. Preview cleanup
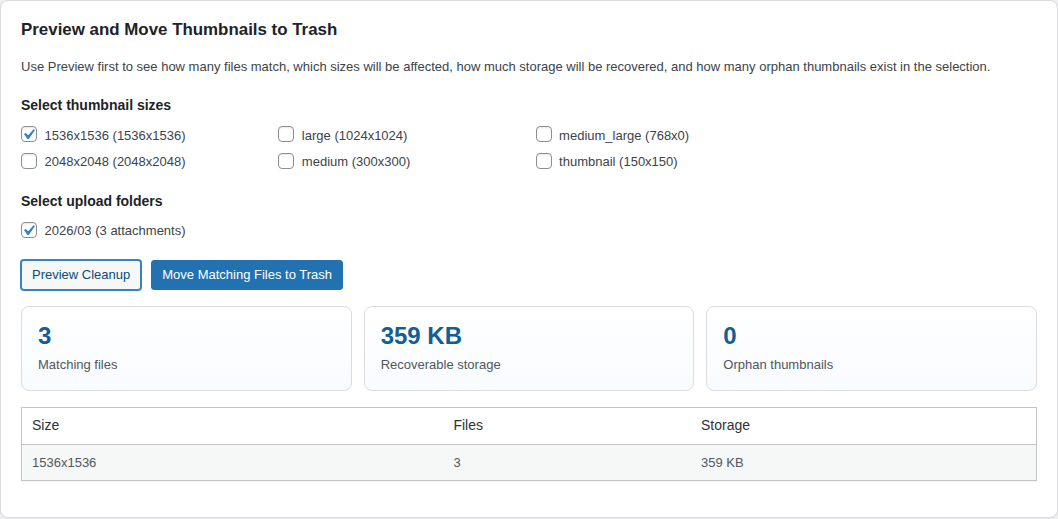
Open the Cleanup tab, select the size or upload folder you want to target, then use Preview Cleanup to estimate impact before moving files.
4. Move matching files to Trash
When you are confident in the preview, move the matching files to plugin Trash. This gives you a restore path instead of permanent deletion.

5. Regenerate missing sizes
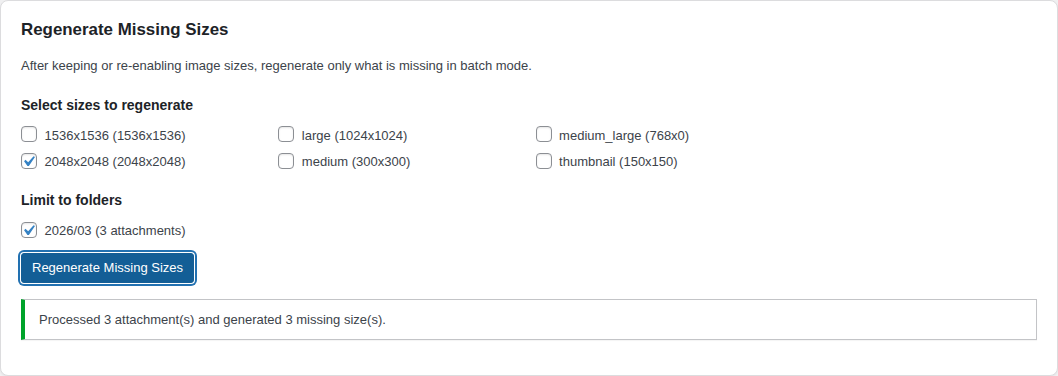
If you re-enable or keep a size, open the Optimize tab and use batch regeneration to rebuild only what is missing.
Recommended first workflow
- Create a backup if the site is production-critical.
- Run analysis from the Analysis tab and review the data.
- Preview a narrow selection first from the Cleanup tab.
- Move matching files to Trash.
- Verify the front end if needed.
- Restore a batch if something needs to be reversed.
- Regenerate missing sizes only where needed from the Optimize tab.